The Apple Pencil is a powerful tool for iPad users, allowing for precise and intuitive drawing, writing, and note-taking. But before you can start using it, you need to connect it to your iPad. In this article, we’ll walk you through the steps of How To Connect Apple Pencil to iPad and get started with this amazing tool.
Why Connect Your Apple Pencil to Your iPad?
The Apple Pencil is a wireless device that connects to your iPad via Bluetooth. Connecting your Apple Pencil to your iPad allows you to use it for a variety of tasks, such as drawing, writing, and navigating your iPad. It also allows you to take advantage of features like pressure sensitivity and tilt recognition, making your experience with the Apple Pencil even more seamless and natural.
Compatibility
Before we dive into the steps to connect your Apple Pencil to your iPad, it’s important to note that not all iPads are compatible with the Apple Pencil. The first-generation Apple Pencil is compatible with the following iPad models:
- iPad Pro 12.9-inch (1st and 2nd generation)
- iPad Pro 10.5-inch
- iPad Pro 9.7-inch
- iPad (6th and 7th generation)
- iPad Air (3rd generation)
- iPad mini (5th generation)
The second-generation Apple Pencil is compatible with the following iPad models:
- iPad Pro 12.9-inch (3rd and 4th generation)
- iPad Pro 11-inch (1st and 2nd generation)
If you have one of these compatible iPad models, you’re ready to connect your Apple Pencil.
How to Connect Apple Pencil to iPad
Connecting your Apple Pencil to your iPad is a simple process that only takes a few minutes. Here’s how to do it:
Step 1: Charge Your Apple Pencil
Before you can connect your Apple Pencil to your iPad, you need to make sure it’s charged. The first-generation Apple Pencil charges by plugging it into the Lightning port on your iPad. The second-generation Apple Pencil charges wirelessly by attaching it to the magnetic connector on the side of your iPad.
Step 2: Turn on Bluetooth

To connect your Apple Pencil to your iPad, you need to have Bluetooth turned on. To do this, go to your iPad’s Settings, then tap on Bluetooth. Make sure the toggle is switched to the on position.
Step 3: Remove the Cap and Plug in Your Apple Pencil
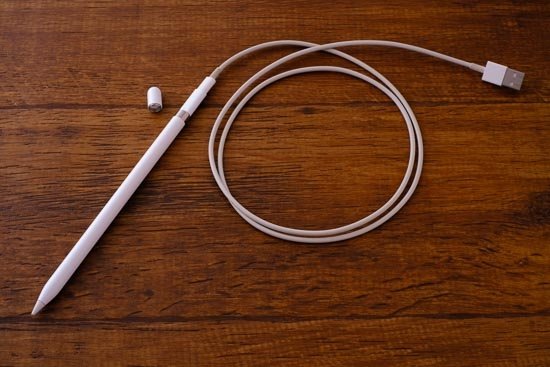
If you have a first-generation Apple Pencil, remove the cap from the end of the pencil to reveal the Lightning connector. Plug this connector into the Lightning port on your iPad. If you have a second-generation Apple Pencil, simply attach it to the magnetic connector on the side of your iPad.
Step 4: Follow the On-Screen Instructions
Once your Apple Pencil is connected to your iPad, you should see an on-screen prompt asking if you want to pair your Apple Pencil with your iPad. Tap on Pair to confirm.
Step 5: Use Your Apple Pencil

Congratulations, your Apple Pencil is now connected to your iPad! You can now use it for a variety of tasks, such as drawing, writing, and navigating your iPad. You can also take advantage of features like pressure sensitivity and tilt recognition to enhance your experience.
Troubleshooting Connectivity Issues
If you’re having trouble connecting your Apple Pencil to your iPad, here are a few troubleshooting tips to try:
Make Sure Your iPad is Compatible
As mentioned earlier, not all iPads are compatible with the Apple Pencil. Make sure you have one of the compatible iPad models listed above before attempting to connect your Apple Pencil.
Check Your Bluetooth Connection
Make sure Bluetooth is turned on and your iPad is within range of your Apple Pencil. If your iPad is connected to another Bluetooth device, try disconnecting it and then connecting your Apple Pencil.
Restart Your iPad and Apple Pencil
Sometimes a simple restart can fix connectivity issues. Try restarting both your iPad and your Apple Pencil and then attempt to connect them again.
Check for Updates
Make sure your iPad and Apple Pencil are both running the latest software updates. If not, update your devices and then try connecting your Apple Pencil again.
Tips for Using Your Apple Pencil
Now that your Apple Pencil is connected to your iPad, here are a few tips to help you get the most out of it:
Customize Your Settings

You can customize your Apple Pencil settings by going to your iPad’s Settings, then tapping on Apple Pencil. Here, you can adjust settings such as double-tap functionality and palm rejection.
Use the Apple Pencil for Navigation
The Apple Pencil can be used as a navigation tool on your iPad. For example, you can use it to swipe between apps, scroll through web pages, and more.
Take Advantage of Pressure Sensitivity and Tilt Recognition
The Apple Pencil has pressure sensitivity and tilt recognition, meaning it can sense how hard you’re pressing and the angle at which you’re holding it. This allows for more precise and natural drawing and writing.
Use the Apple Pencil with Third-Party Apps
There are many third-party apps that are compatible with the Apple Pencil, such as Procreate, Notability, and Adobe Photoshop. These apps allow you to take your creativity to the next level with the Apple Pencil.
Conclusion
How To Connect Apple Pencil To Ipad is a simple process that allows you to take advantage of all the amazing features this tool has to offer. By following the steps outlined in this article, you can easily connect your Apple Pencil to your iPad and start using it for a variety of tasks. With the right settings and apps, the Apple Pencil can enhance your iPad experience and take your creativity to new heights.
You may like reading about the following:
For more information, visit: Tech Me Life


